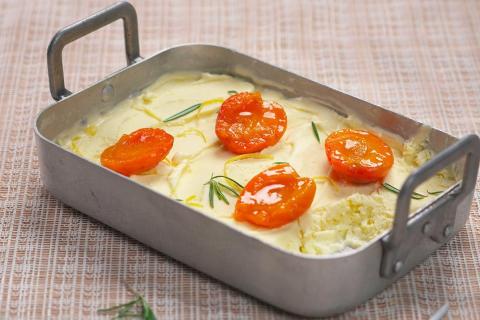
Get ready for a delicious summer treat with our easy homemade ice cream recipe. Perfectly complemented by the tangy twist of roasted French apricots, it’s a taste of France in every spoonful. No ice cream maker? No problem! Our delicious crème fraîche and summer fruit recipe doesn’t require an ice cream machine, making it a fun activity to share with the kids.
How to Make Ice Cream Without a Machine
Making ice cream without a machine is easy and requires hardly any equipment. Whisk 2 cups of heavy whipping cream in a big bowl with a hand mixer or stand mixer until stiff peaks form. In another bowl, combine 1 can of sweetened condensed milk, 1 teaspoon of vanilla extract and any flavorings you like (cocoa powder or strawberry puree). Fold the whipped cream into the sweetened condensed milk mixture until smooth, being careful not to knock the air out for that creamy texture.
Pour the ice cream mixture into a loaf pan or metal baking dish, cover it tightly with plastic wrap or parchment paper-lined foil to prevent ice crystals, and freeze for at least four to five hours or overnight. This no-churn method is a quick and easy way to create homemade ice cream that’s just as indulgent as store-bought varieties.
Tips for Making Perfect Homemade Ice Cream
Stir every 15 minutes to break up any ice crystals. Use full fat cream for a richer flavor and don’t skip the lemon zest – it adds a refreshing brightness!
What are the Basic Ingredients for No-Churn Ice Cream?
The beauty of no-churn ice cream is in its simplicity. You’ll need:
- Heavy whipping cream (2 cups): The base for a light and airy texture.
- Sweetened condensed milk (1 can): For sweetness and smoothness.
- Vanilla extract (1 teaspoon): For classic vanilla ice cream flavor.
- Flavorings and mix-ins: Cocoa powder for chocolate ice cream, crushed cookies like Oreo, or a swirl of peanut butter. Fresh fruits like strawberries, blueberries or pureed peach work too.
- A pinch of sea salt: To bring out the flavors without overpowering the mix.
This is it, the simple ingredients create a creamy and yummy treat that you can customize with your favourite mix-ins.
What are Some Popular Homemade Ice Cream Flavors?
Homemade ice cream opens up so many possibilities for flavors beyond vanilla ice cream. Here are some to try next:
- Chocolate Ice Cream: Add 2 tablespoons of cocoa powder to the condensed milk.
- Mint Chocolate Chip: Fold in a few drops of mint extract and mini chocolate chips.
- Salted Caramel: Swirl in salted caramel sauce and top with a sprinkle of sea salt.
- Strawberry or Raspberry: Mix in a cup of fresh pureed strawberries or raspberries.
- Peanut Butter Swirl: Add a swirl of creamy peanut butter.
- Rocky Road: Combine chocolate ice cream with mini marshmallows, nuts and chocolate chips.
Whichever flavor you choose, each scoop is homemade with love and everyone will be waiting for it.
How to store homemade ice cream
Storing it properly will keep your ice cream creamy and ice crystal free. After freezing, transfer the ice cream to an airtight container and cover the top with plastic wrap or foil lined with parchment paper. This will prevent ice crystals from forming on top. Store the container in the coldest part of the freezer and keep it sealed.
Homemade ice cream is best consumed within 2 weeks for optimal flavor and texture. If the ice cream is too hard, let it sit at room temperature for a few minutes before scooping. With proper care, your homemade ice cream will taste just as good as when you first made it!
No-Churn Ice Cream Tips
To make sure it turns out perfect every time:
- Use cold heavy cream and a metal bowl to whip the cream faster and better.
- Fold the whipped cream into the condensed milk mixture gently so the air stays in the cream.
- Don’t over mix, this will deflate the whipped cream and make the ice cream less light and creamy.
- When adding in mix-ins like chocolate chips or cookie crumbs, stir them in evenly so every bite is loaded with flavor.
- Freeze in a loaf pan or metal baking dish.
Variations on the Recipe
You can customize this recipe in so many ways. For a rich base use whole milk or a high fat content cream. Add vanilla beans, honey or fresh fruit purée like blueberry or banana to the ice cream base for a natural sweetness. For a deeper flavor fold in Nutella, caramel swirls or a layer of cheesecake filling before freezing. Mix-ins like chocolate chips, crushed cookies or chopped nuts add texture. If you’re feeling fancy try blending in leftover cookie dough or a spoonful of coffee concentrate for a grown up twist. The result will be frozen perfection, customized to your taste.
Try vanilla beans, honey or fresh fruit puree in your ice cream base. For a deeper flavor, add in crushed nuts, chocolate chips or a swirl of caramel or jam before freezing.
Serving Ideas
To make your no machine ice cream even more special, try these serving ideas. Top with crushed nuts for crunch, coconut flakes for a tropical twist, or honey for extra sweetness. Fresh mint leaves or a dusting of cocoa powder will finish it off beautifully. Serve in small bowls with a brownie or cookie dough wedge on the side. Scoop into plastic bags, snip a corner and pipe into cones for a soft serve look. Add fresh fruit or mini chocolate chips for fun.
How to Get the Right Consistency
Getting the right consistency is key to no churn ice cream being smooth and creamy. Whip the cream at the right speed—low at first, then medium-high until stiff peaks form.Be sure to gently fold the whipped cream into the base to keep as much air as possible, as this will give the final product its light texture. If you’re using mix-ins, make sure they’re evenly distributed after folding. For best results, freeze the mixture in a flat, wide dish like a loaf pan to allow the freezer to chill it more evenly. Avoid too much stirring during freezing, as it can disrupt the air pockets that make the ice cream fluffy.
Tips for Small Batches and Quick Freezing
If you’re short on time or want a small batch of ice cream, divide the mixture into smaller containers or plastic bags for quicker freezing. A quart-sized bag works well—just squeeze out the air and lay it flat in the freezer. To speed things up further, place the bags in a bowl of salted ice and shake them vigorously for ten to fifteen minutes. This is a great option when you’re craving a quick treat and can’t wait hours for the ice cream to set. You’ll get a semi-soft serve consistency that’s ready to enjoy immediately.
Preparation time
Ingredients For
-

-
150 ml
-
x 150
-

-
x 1
-

-
x 1
-
1 tbsp
Preparation
1
Whip the Isigny crème fraîche with the single cream, sugar and lemon zest. Pour into a dish and set aside in the freezer for 3 or 4 hours, stirring every 15 minutes.
2
While the ice cream is resting, wash and halve the apricots. Melt the butter in a frying pan over a medium heat and add the rosemary sprigs and apricots. Cook the apricots, stirring regularly. Add the brown sugar and leave to caramelize for a few minutes. Drizzle with the butter.
3
Serve a scoop or quenelle of ice cream on each plate with some roasted apricots.


